fbpx
  • Your Trusted 24 Hours Electrical Service Provider!
  • Talk To Expert : 908-568-8000

Category Archives: Electrical

Categories Electrical

Signs It’s Time to Upgrade Your Electrical Panel

Electrical Switchboard

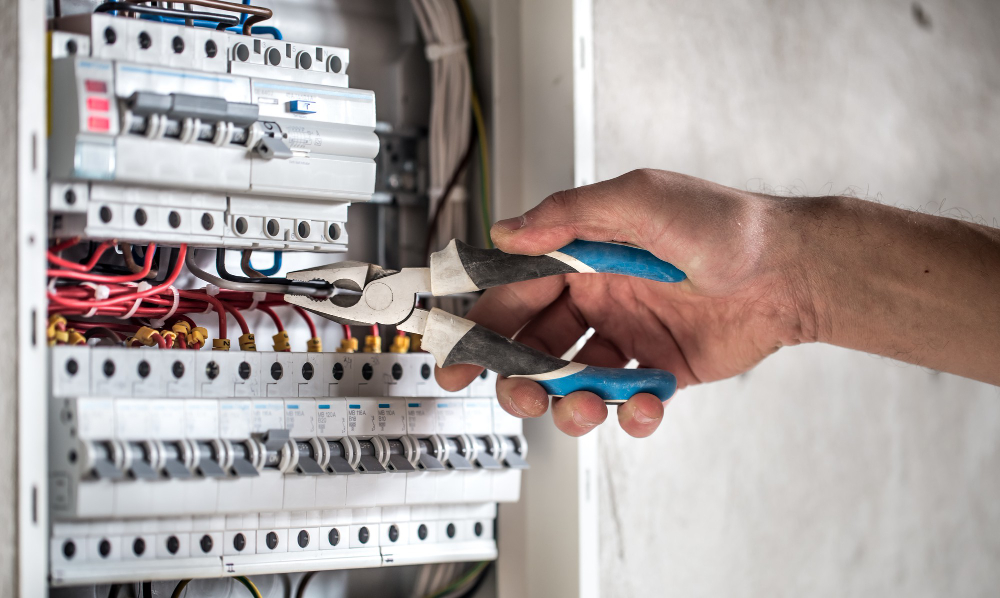
Your electrical panel also called your breaker box, controls all the electricity in your home. It receives the electricity from your utility company, then distributes it to each of your home’s circuits. The circuits in turn supply power to all your outlets, lights, appliances, and other electrical devices. Your electrical panel is your control center, allowing you to turn off power to sections of your house when needed.

However, it’s much more than a switchboard for you to control your home’s power; your electrical panel has several important functions to keep your home safe and your electrical system running efficiently. The right electrical panel upgrade can keep your family safe and allow your system to keep up with your needs. How do you know when the time has come to upgrade your electrical panel? Read on for some telltale signs.

1. Your Home is Older

As our reliance on technology has increased, so has our need for electricity in our homes. Computers, entertainment centers, and air conditioners were not common in older homes. Consequently, their electrical panels were not designed to handle the load we are asking of them. A house built in the past perhaps had an electrical panel with a power rating of 60 amps, while a new house today may have a power rating of 100 amps or 200 amps.

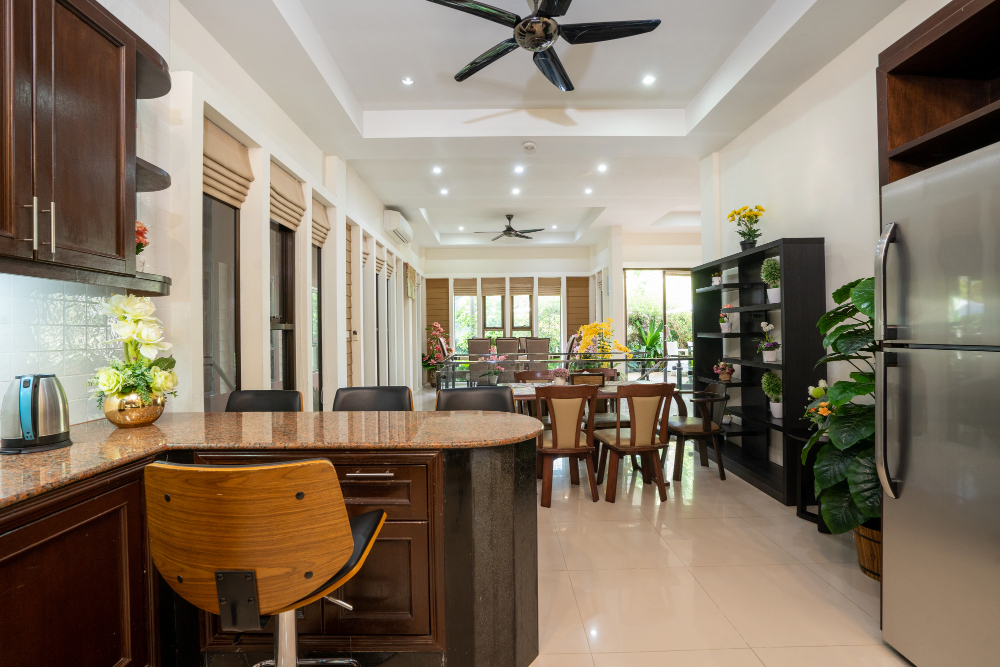
2. You Don’t Have Enough Outlets

If you find yourself using extension cords regularly, that means your home doesn’t have enough outlets to meet your needs. An extension cord is designed to provide power when it’s needed for a brief period of time. For example, you have a party and need to put a lamp outside for the evening. When used heavily, extension cords can wear out quickly and may become fire hazards. So instead of creating a tripping hazard with a network of surge protectors and extension cords, upgrade your electrical panel and add more outlets to your home!

3. Your Panel is Full of Fuses, Not Circuit Breakers

It is possible that older homes may have fuse-based electrical systems instead of circuit-based ones. Whenever a circuit breaker is overloaded, it will “trip”, halting electricity flow safely. Fuses melt, blow, or short-circuit when overloaded, which carries a small risk of fire.

4. You Are Frequently Tripping Breakers

If you find yourself constantly having to go to your breaker box after tripping a circuit breaker, upgrading your electrical panel will end this problem. Circuits trip frequently when the electrical panel is old and worn out or malfunctioning. It can also mean that your old panel can’t handle your energy needs.

5. You’ve Upgraded Your Home and/or Appliances (or plan to)

Your electrical panel was designed to meet the energy needs of your home as it was when it was constructed. If you’ve built an addition, turned the basement into livable space, or otherwise significantly increased your demands, you most likely need an upgrade so your electrical system can keep up. Adding lots of modern appliances can also draw a great deal of power, so if you’ve finally gotten a dishwasher or a clothes washer and dryer when you didn’t have one before, you may need an upgrade.

6. Your Electrical System is Overloaded

Constantly overloading your electrical system not only makes it perform poorly, it’s also a safety hazard! If your electrical system is struggling to keep up, you will most likely notice some of these signs:

  • Lights flicker frequently
  • Lights dim when an appliance turns on
  • Breakers trip or fuses blow frequently
  • Some of your outlets are singed
  • You smell burning around a switch or outlet
  • Outlets emit sparks when you plug or unplug a cord
  • You get shocked when plugging or unplugging cords

Right Electric

Don’t waste your time trying to solve the air conditioning issues yourself! Contact the professionals at Right Electric here or at our phone number 908-568-8000

Categories Electrical, Home Maintenance

Does My Chandelier Need Re-Wiring?

chandelier re-wiring

Rewiring an old chandelier may be necessary. Here, we’ll look at how to know a fixture needs new wiring, and whether you’re better off calling an electrician. But re-wiring a chandelier doesn’t have to be that complicated. It can also breathe new life into your treasured fixture.

Signs of faulty chandelier wiring include:

  • The light is dimmer than it used to be.
  • Bulbs are flickering on and off.
  • You need to replace bulbs more often.

Of course, there are other signs of bad wiring to look for, such as burning odors, buzzing or humming sounds, or the fixture is warm to the touch. A chandelier is a centerpiece that adds a unique charm to the room. When properly cared for, it can last longer than most other light fixtures, but loose, corroded, or broken wires can turn a chandelier into more of a nuisance if not a danger.

What to Do When Your Chandelier Needs Re-Wiring

Unless you have some electrical knowledge and skill, it’s best to leave this kind of work to a professional electrician. The following steps will help you understand how to rewire a chandelier:

  1. Turn Off the Circuit: Go to the electrical panel, find the breaker switch for the chandelier circuit, and switch it off. Use a circuit tester at the fixture to verify there’s no power. If it indicates the current is flowing, check whether you turned off the right circuit breaker.
  2. Loosen the Fixture: Loosen the rounded base or another component that secures the chandelier to the ceiling. Slide it to the bottom hub. The grounding wire should be copper, the neutral/earth wire white, and the hot wire yellow. Remove the wire connectors and unwrap electrical tape if present while supporting the fixture. Don’t let it hang by the wires or you may require additional electrical repair.
  3. Unscrew the Chandelier: Use the threaded nipple to loosen the chandelier and remove it from its mounting. There will be an electrical box holding the threaded nipple if the fixture is newer. Measure the length of each wire through each arm of the chandelier, plus 1 inch (to account for wire stripping later).
  4. Disconnect the Wiring: If the dome is removed from the fixture, the wiring will be exposed, or it may be covered. Follow the owner’s manual or method and configuration of your chandelier for the exact procedure for removing exposed wires. Remove the wires and socket housings.
  5. Install the New Wire: Cut each lamp wire to size and thread it through each arm. Strip off ½” of plastic insulation to expose the wire; split it and group the neutral and live wires together. Twist the ends of these together in a clockwise direction. On top of them, twist a wire connector and ensure all wire strands are enclosed.

Don’t waste your time trying to solve the chandelier issues yourself! Contact the professionals at Right Electric here or at our phone number 908-568-8000

Categories Electrical, Home Maintenance

How to Reduce Energy Costs For Your Home

Home Villa

1. INSTALL EFFICIENT LIGHTBULBS AND LIGHT FIXTURES

Old fluorescent bulbs and outdated light fixtures consume far more energy than modern bulbs and fixtures. To achieve the same amount of light coverage while drastically reducing energy consumption. Consider installing modern LED lights and swapping out old fixtures for new units with built-in LED lighting. It is also possible to reduce energy costs without reducing visibility by using natural light during the day instead of turning on your lights.

2. UTILIZE A PROGRAMMABLE THERMOSTAT

For the average home, temperature control represents one of the largest energy expenses every year. To reduce these energy costs, many homeowners are switching to programmable or smart thermostats. Depending on whether you are at home or away, these units allow you to set different temperatures. Further reducing energy consumption and wear on your heater/air conditioner. Apps are available for many of these devices that allow manual adjustments from anywhere at any time.

3. PURCHASE HIGH-QUALITY WINDOWS AND INSULATION

Temperature control often overlooks insulation and windows. Cheap insulation and thin windows can cause the interior of your home to be more susceptible to extreme external temperatures. Further requires your furnace or air conditioner to work harder to maintain a comfortable environment. Quality insulation and thick windows can pay for themselves through consistent energy savings. As well as noise reduction, and enhanced comfort, making them well worth the investment.

4. USE COLD WATER WHENEVER POSSIBLE

Heating water consumes more energy than most homeowners think, especially for prolonged showers and washing clothes. Despite years of washing with hot water, most modern washing machines and clothes are made for cold water. This allows you to use cold water to achieve the same level of cleanliness while cutting down on energy usage.

Get in touch with Right Electric to learn more about energy efficiency for your home or to discuss your electrical project. Contact us here or call us at 908-568-8000.

Categories Electrical, Home Maintenance, Lighting

Outdoor Lighting for WalkWays

Outdoor Lighting

What Is a Pathway Light?

Well-designed pathway lighting provides safe passage along walkways, stairs, and other outdoor paths. Pathway lights are a functional and elegant addition to your exterior landscape. Further provides soft illumination that enhances your landscape without feeling harsh. They also come in a multitude of options, including garden lights, downlights, bollards, and flush lights.

What Are the Benefits of Pathway Lighting?


Pathway lighting offers many benefits, including:

  • Enhanced safety for visitors, further helping prevent tripping and missteps.
  • Upgraded security, eliminating shadows where intruders might conceal themselves.
  • Garden protection, further prevents accidental trodding by revealing the boundaries of pathways.
  • Revealing elevation changes like stairs or inclines.
  • Highlighting low-growing plants for added visual interest.
  • Improve your home’s curb appeal by enhancing its best features with proper lighting.
  • Providing ambient lighting for entertaining in the garden or other outdoor areas.

Different Styles of Pathway Lights


Pathway lights come in a variety of styles. Homes and Gardens magazine offers a glimpse at how you can use pathway lighting to enhance your yard. Understanding your options can further help you create a lighting plan that suits your space best.

Garden Lights


A DIY pathway lighting kit often includes garden lights as part of its lighting components. They typically stand between 18 to 24 inches tall. These further include a canopy that helps reflect light down onto paths and garden beds. Garden lights also come in a wide variety of styles.

Downlights

Downlights are a versatile pathway lighting option. In these lights, the light is set higher, usually mounted to a pole, a wall, or a nearby tree. Lights located higher provide a wider area of coverage. Their design directs light towards the ground like a moonbeam, bathing a pathway or section of the garden in gentle illumination without irritating side glare.

Bollard Lights


Bollard lights, otherwise known as pillar lights, are brighter than other forms of pathway lights. As suggested by the name, these are pillars that spread light in 360 degrees. For this reason, they are an excellent option for the beginnings, intersections, and endings of pathways. Walkers benefit from their limited use in that they can see the paths clearly without being blinded by glaring light. Like garden lights, they come in various styles and can be a visually stunning element of your landscape.

Flush Lights


In accordance with their name, flush lights are installed in the ground, pathways, or low on a garden wall. Some feature built-in eyelids to direct light in a particular direction and help reduce glare. Flush lights can highlight the pathway or nearby gardens without blinding or distracting other features in the landscape.

Pathway Lighting Design Tips


If you are relatively handy, you can install your own path lighting. If you are tackling the project on your own, these tips will help ensure the best results.

  • Situate lighting fixtures about 10 to 15 feet apart to ensure pathways are well lit without being overpowering.
  • Ditch the runway look—stagger lights on either side of the pathway.
  • Install downlights, bollards, and garden lights slightly away from the path. Doing so will ensure an adequately illuminated pathway while also showcasing garden elements that frame the walkway.
  • Always keep lights directed away from the eye. Further towards or across the ground. Limit the use of brighter bollard lights to keep glare to a minimum.

Right Electric

Right Electric specializes in outdoor lighting and prides itself on customer satisfaction all over the New Jersey area. Contact us here or at 908-568-8000.

Categories Electrical, Home Maintenance

Mistakes to Avoid When Lighting Your Home

Modern LED Bulbs

There are a lot of decisions that go into home ownership, and one of the most important is lighting. It’s important to get it right because improper lighting can lead to decreased energy efficiency. Further, higher electricity bills, and a lower quality of life. Your home’s lighting may not be something you’ve considered changing because you use it every day. However, making sure your home’s lighting system functions correctly is crucial for your daily life.

In this blog post, Lightning Bug Electric will discuss some of the most common mistakes homeowners make with their lighting. We’ll provide tips on avoiding these mistakes, so you can enjoy better light in your home.

LEAVING THE LIGHTS ON IN UNUSED ROOMS

One of the most common mistakes homeowners make with their lighting is leaving the lights on in unused rooms. This is a waste of energy and money, and it’s unnecessary! You can quickly develop a bad habit of leaving the lights on when you leave a room. If you have a room that you don’t use often, simply turn the light off when you leave. You should also make sure you shut off as many lights as possible before leaving your home. This will save you money on your electricity bill. In addition, it will also help to prolong the life of your light bulbs.

USING THE WRONG LIGHT BULBS

Another common mistake homeowners make is choosing the wrong light bulbs. There are many different light bulbs available on the market, and not all of them are created equal. You can save money and enjoy better light by choosing the right type of bulb. LED bulbs are a great option for many homeowners, as they are energy-efficient and long-lasting. You’ll actually save money on your electricity bill if you go with LED lights. Plus, LEDs sound like the best option if you’re always buying the wrong light bulbs and constantly replacing them.

CHOOSING THE WRONG SIZED FIXTURES

Another mistake that homeowners often make is choosing the wrong sized fixtures. This can lead to poor light distribution and an overall decrease in quality of life. Your home will look better with fixtures that are the right size for you.

NOT USING DIMMER SWITCHES

Finally, many homeowners don’t use dimmer switches. Switches that dim the lights in a room are a great way to save energy and money. If you have a room that doesn’t need a lot of light, simply turn the switch down to save energy. It’s also fun to experiment with dimmers in a room to create ambiance!

Lighting Services Near You

At Right Electric we prioritize the comfort of our customers in their homes, and that includes making sure their lighting system is functioning properly. We are the local electrician for the job, based in Whitehouse Station and proudly serving all over New Jersey including Franklin Township, NJ. Need an electric service upgrade? We can help. Contact us here or at 908-568-8000.